


Office partitions are a flexible, convenient and cost-effective way of dividing up your space. Not only do they offer an effective and attractive visual barrier, many also come fitted with acoustic materials that help to control and dampen sound, enhancing privacy in your office.
How to install office partitions will vary depending on the type of office partition you buy. Glass office dividers, for example, are an attractive option that help to break up your layout while maintaining the impression of an open plan space. These partitions will require the services of a professional builder, which means they’ll likely be more costly and take longer to set up.
Similarly, ceiling-hung partitions, which can be made from wood, aluminium, and even glass, require serious construction work, including the installation of tracks and a supporting beam by a professional building company. Such solutions, therefore, can become quite costly and typically take months to complete.
The good news is, there are many office partitioning solutions that you can install yourself to transform your space and enhance productivity at your company. Some are so easy to install that it takes just minutes!
Whether you’re planning on creating a temporary meeting room, enhancing privacy for employees in the workplace, or setting up a network of cubicles, we’ll take you through the process of installing office partitions in your office space.
Here’s how to install office partitions for your business.
Measure the length and heights you need
If you want to divide a room in two or create smaller areas within a room measure the length and heights that the ideal partitions should have. With a simple measuring tape measure the ideal length and the height necessary for the division to work. With these measurements choose the partition type that will work for your space and your budget. If you find that you need a very long wall, consider you can buy and join multiple units together instead of buying a single very long divider that could be impossible to find or build.
Choose the type of office partition that works best
The right type of office partitions for your needs will have the right size, colours, properties, installation requirements and delivery time for your budget. Once you know which office partition will work better for your space search online and purchase the ones you feel will get the job done.
At this stage consider what you expect the partitions to accomplish before going ahead and buying. If you want to reduce noise in your office you might need a different solution than if you’re just trying to use your office space more efficiently, so you might want to do some research before moving on. Depending what you’ve bought you can read through the installation process that matches your partitions.
Assemble your office dividers
For many people assembly can be a deal breaker both in cost and timelines, so it’s a good idea to review the assembly process and timelines involved before buying to avoid any surprises. If you have already bought, assembly will be the last step to install office partitions in your office. Assembly instructions will vary and some of them can only be installed with the help of professionals that will most likely be supplied by the company you have bought the units from. For all other options we’ve got you covered with step by step instructions and videos to help you understand what the process looks like. Keep in mind that any option not included on this list will take considerably longer to manufacture and may require engineers and other professionals to install.
How to assemble freestanding room dividers
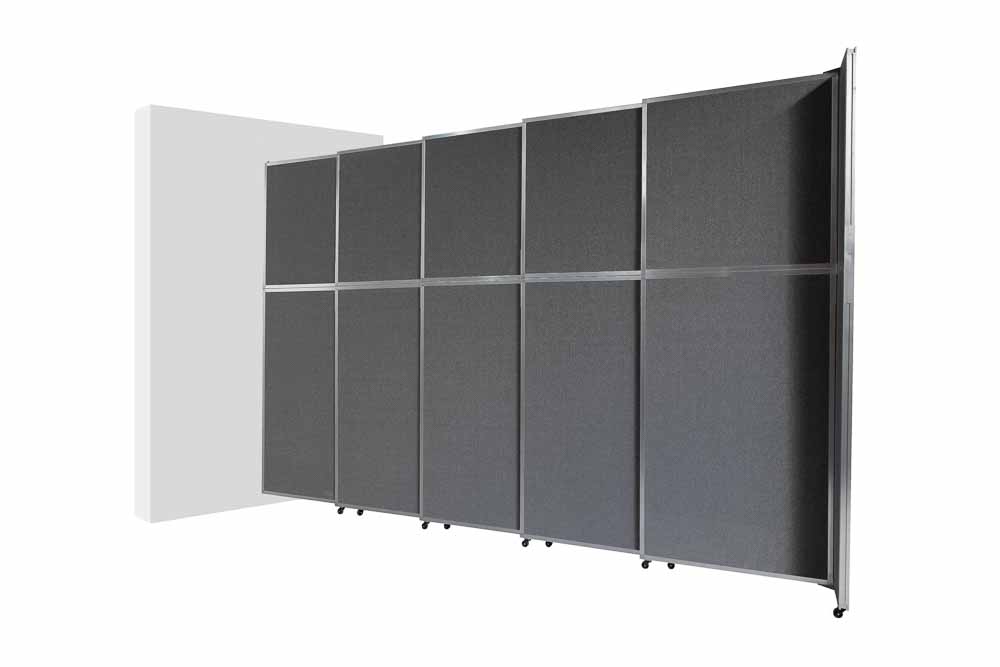
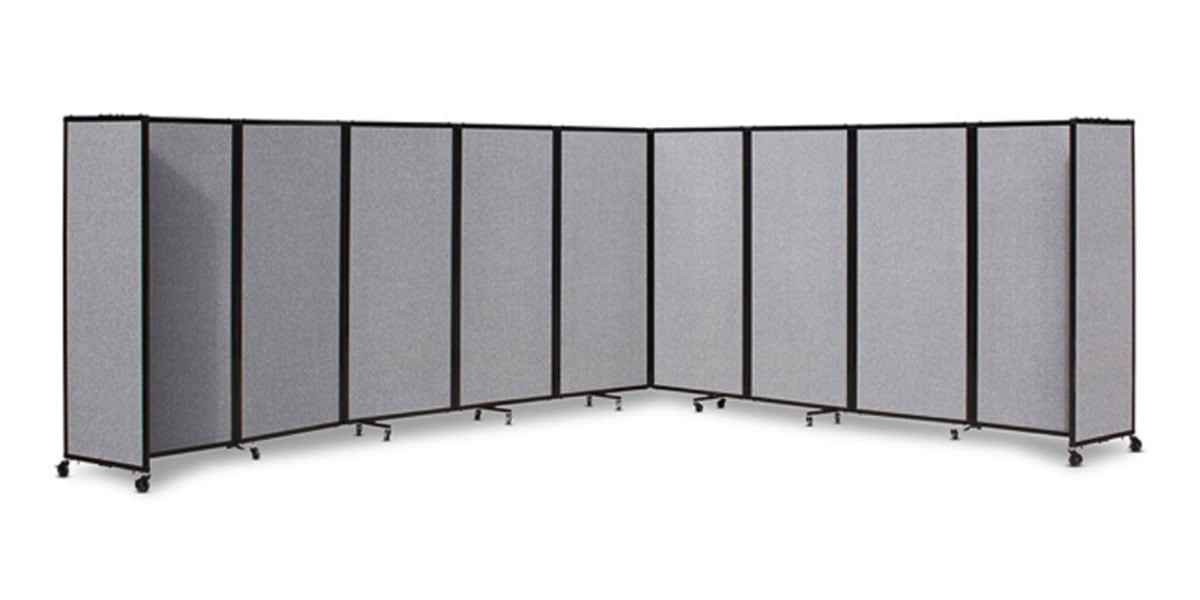
A lightweight and highly portable form of office partition, the beauty of freestanding room dividers is in their incredible adaptability.
Typically mounted on wheels, these room dividers are completely freestanding, giving you the ability to roll your partitions across the floor to create private work areas or meeting rooms anywhere in your building.
Freestanding partitions come in a variety of different colours, from sound dampening fabric to glass office partitions.
Freestanding room dividers often feature either a telescoping or folding design, which means they can be packed down when not in use.
Before making a purchase, it’s best to measure the spaces where you most expect to use your partitions, so that you can choose the right size. You don’t want to have to return your dividers because they’re too small for your space.
Similarly, you should measure all the doors in your workplace. As freestanding dividers are designed to roll across the floor, if they’re too tall to fit through the door, it’s going to seriously impact their functionality.
Not only is a freestanding solution a convenient and versatile option for businesses, they’re also very easy to construct. Our range of freestanding room dividers, for example, can be set up in less than 30 minutes.
Here’s how:
Step 1: Lay the panels on top of each other in ascending order, making sure the hinges are aligned.
Step 2: Attach the hinge systems and tighten with a flathead screwdriver.
Step 3: Remove the supplied bolts, one at a time, and tighten the wheel base into position. Repeat this step for all bolts and wheel bases.
Step 4: Place end panels side-by-side and screw the end panel attachment into position.
Step 5: Attach the end panels to each end of the main panels by tightening the bolts supplied.
Step 6: Attach the locking system and make sure all bolts have been tightened before standing the partition up.
Step 7: Lift the partition up onto its wheels and away you go!

How to assemble your operable walls
Taller than freestanding partitions, operable wall systems typically need to be attached to either the ceiling or mounted to the wall at one end. They can be made from a wide variety of materials, including fabric, aluminium and even glass partitions. Some operable walls even come with glass windows, so that you can set up a space that looks just like a regular wall!
Operable walls can be used for a variety of different purposes, from setting up different departments within a store, to creating temporary meeting rooms for staff. While ceiling-mounted walls are perfect for controlling sound and reducing noise pollution in your business, they typically require professional installation and major engineering and construction work, therefore, we won’t be covering the steps here. Wall-mounted operable partitions, on the other hand, can typically be attached to the wall with the simple use of an electric screwdriver and a few bolts and brackets.
Such a simple attachment system and low-construction installation means that wall-mounted operable walls can be a functional addition to any space, including rented buildings. Lower in cost, and easier to move, a business that chooses this style of partition will save money on expensive builds while retaining the functionality of their offices. The demountable design also offers greater stability for a taller wall that won’t pose a toppling risk.
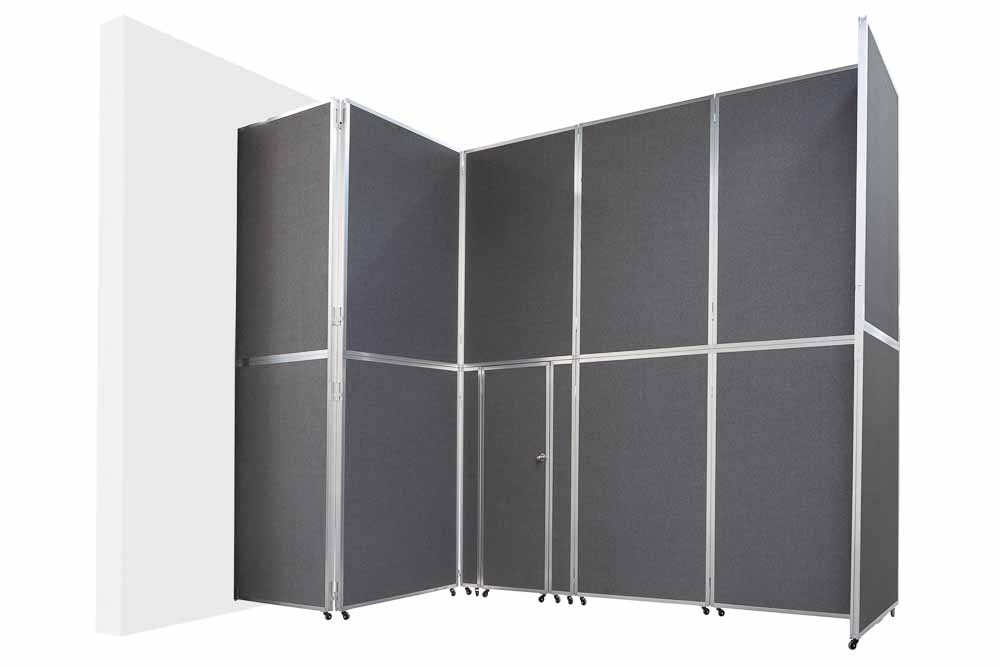
Operable walls are extremely easy and quick to install. Our range of operable walls, for example, shouldn’t take more than an hour to set up:
Step 1: Identify the wall-mounted side of panel 1 (this will be clearly labelled).
Step 2: Attach the top wall bracket to the top corner of panel 1.
Step 3: Install the bottom wall bracket into the stud or wall where the operable wall will be mounted.
Step 4: Lift panel 1 into position and temporarily attach it to the bottom wall bracket that was installed in step 3.
Step 5: Mark the resulting position of the top wall bracket, which was installed in step 2.
Step 6: Detach the top wall bracket from panel 1 from the bottom wall bracket to allow space to drill.
Step 7: Drill the top wall bracket into place and re-attach panel 1 to both the top and bottom wall bracket.
Step 8: Place panel 2 against panel 1, following the coloured labels.
Step 9: Create a hinge by placing and securing one of the pins provided through the top and bottom tags on each side of the panel.
Step 10: Repeat for all panels.
Step 11: Attach a T-bracket to the top and bottom of the end panel.
Step 12: Attach the end panel to the last main panel installed and secure the bolts.
Step 13: Open your newly installed operable wall!
How to set up small privacy screens
Privacy screens are a smaller office partition that can be used to offer a little extra privacy for employees within your workplace.
These screens can vary from single panels screens to multi-panel setups, and are an excellent option for helping to reduce distractions and offer greater comfort for employees at their workstations.
Generally speaking, small privacy screens are very quick to assemble. Installing our screens, for example, typically takes no more than 5 minutes and requires little more than the bolts provided, a willing pair of hands, and an Allen key.

It’s as easy as 1, 2, 3!
Step 1: Remove the supplied bolts from each end of the partition and re-attach the feet or wheel bases back into position, repeating for both sides.
Step 2: Tighten the bolts all the way with an Allen key.
Step 3: Stand the partition up.
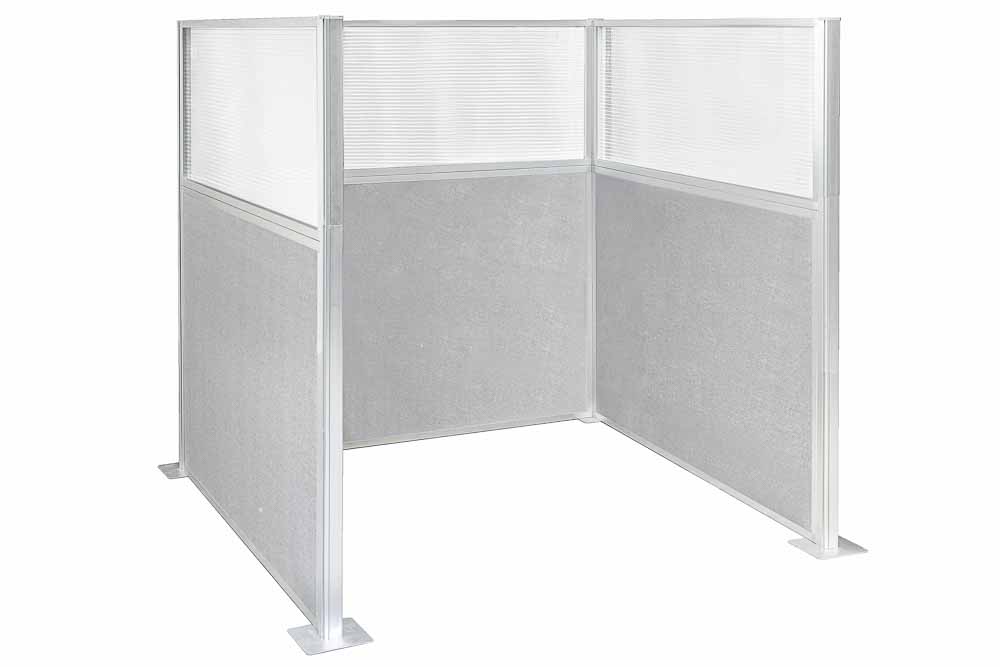
How to set up your modular office cubicles
Modular office cubicles offer a little more flexibility than fixed cubicles. Typically featuring a clever panel-and-post system, they can be configured to a wide variety of shapes to suit any space, without restricting your ability to make changes in the future.
Making it easy to add and remove cubicles at any time, the modular system offers greater freedom to customise your layout whenever and however you like.
Panel-and-post modular cubicles are easy to set up and can be used to construct an entire network of office cubicles in minutes. No tools required!
Step 1: Arrange the feet into position.
Step 2: Place the panel in position between the feet.
Step 3: Slide the post through the panel and into the feet to connect them.
Step 4: Repeat this process to join each panel until configuration is complete.
Need guidance on how to assemble your office partitions?
If you’ve purchased any of our partitioning solutions and need help understanding how to assemble your office partitions, or are looking for ideas for setting up a functional and attractive office for staff and customers alike, our friendly team of customer service staff are always here to help.
Simply give us a call if you have any questions or if you’d like to know more about our extensive product and service offerings